
Camera guide
How to use your camera
Starting recording
Before starting your shift, ensure your Antare Body-worn Camera is fully charged. Use either the Antare Dock or a USB-C charger.
The camera will be fully charged when you see a solid green light on it.
To start using the camera:
- 1. Remove it from the Antare Dock or unplug the USB-C charger - the camera turns on and starts recording right away.
- 2. Optionally, you can use the Antare App to scan the QR code on the back of the camera. This assigns the camera to you for the session.


Wearing the camera
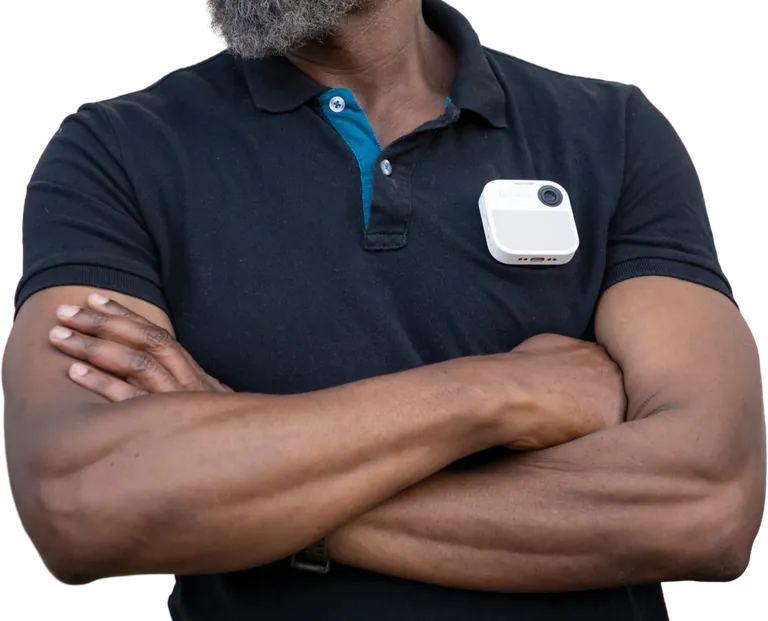
Place the camera on your upper body where it is level and unobstructed
Camera buttons
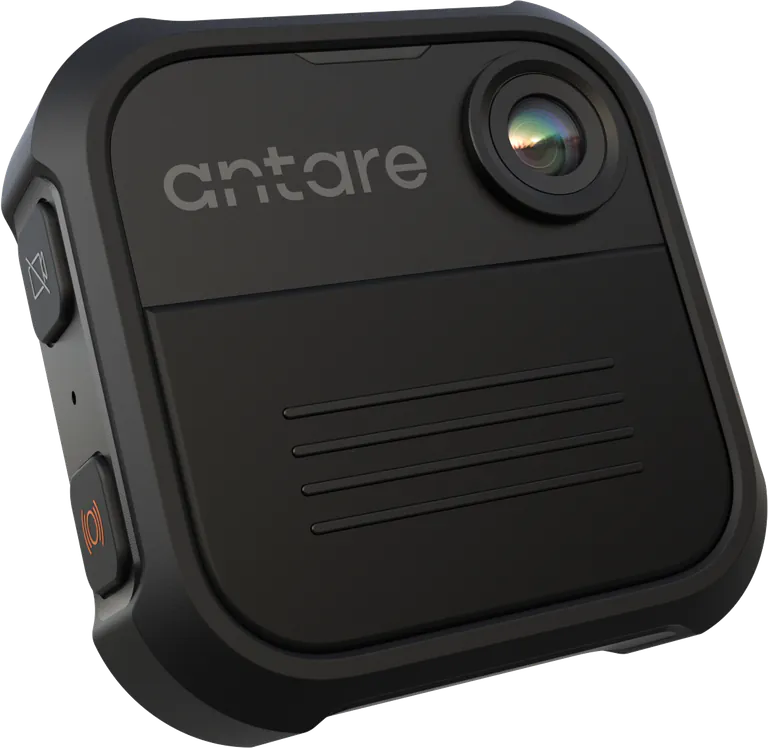 123
123The camera has 3 buttons
- 1Record buttonMarks the footage as important for review
- 2 Privacy button Activates privacy mode for 5 minutes
- 3 SOS button Starts an SOS live-stream and alerts your organization via the Antare App, Antare Console, and email.
Stopping recording
Return the camera to the Antare Dock or plug in the USB-C charger. The camera stops recording and starts uploading your footage via Wi-Fi or Ethernet (via the Antare Dock).
What the lights mean
- Slow white pulseRecording normally - nothing to do.
- Solid redBattery low (under 20%) - plug in to charge soon.
- Solid amberPrivacy mode on - press any button to stop early.
- Slow red pulseYou've flagged a moment - press the record button again to stop flagging.
- Fast red blinkSOS is on - your organization has been alerted and the camera is live-streaming. Press SOS again to stop.
- Slow red pulse, on chargerCharging - leave it plugged in.
- Solid green, on chargerFully charged - unplug and wear.
Managing your cameras
Admins can manage all cameras in the Antare Console
We value your privacy
We use cookies to make our site work, understand how it is used, and improve your experience. Necessary cookies are always on. You can accept or reject the rest, or choose what to allow.